The last few months I have been working on and off on some bronze castings, one of which is an astronaut on a rock. It is part of a series where I am exploring monuments, trophies and markers, not necessarily in that order.
The casting process is laborious if you are doing it all yourself. First you need to create the form. For the astronaut I started off with a plaster cast relief, a left and a right. For the rock, I used, well, a rock. Next you need to make a mold, I made a rubber and plaster molds for each piece, the rock was a two piece mold. Of course I had to do this project as a multiple, so for each piece, (left, right, rock), I next had to make a wax positive, this is essentially a wax casting of the finished piece. Then you sprue and gate the pieces. This is a process of channels that allows the metal to flow in and a way for the air to come out, think no voids I the final piece. Of course you can hang multiple pieces on each of the Spurs and gated mold to be cast. Next you dip the sprue and gated positives in a ceramic slip, then coat with sand until it’s about a quarter of an inch to three eights of an inch thick. Next you melt out the wax in a kiln or with a heat gun and your half way to finished, because after you pour the metal the work begins.
That work entails cutting the sprue and gates off of your finished pieces, grinding, lots of grinding in my case. Then I get to figure out how to assemble them. Here I went with screws, nuts and bolts, I could have welded… Next we polish and polish some more and we get to the step where we patina the final assembly. I went with a traditional brownish tone. Then you can polish it up a little more to add some depth and finally apply several coats of wax.
That’s all there is to it! Ugh.
-

-
Study for Bronze casting
-

-
Rock mold on top, grumpy fish mold below.
-

-
Wax positive still in plaster and rubber mold.
-

-
Front and back of a wax positive.
-

-
Positives all lined up waiting to be sprued and gated.
-

-
Sprue and gated rocks. Next step ceramic
-

-
First dip is just ceramic slip so as to capture all of the detail
-
-
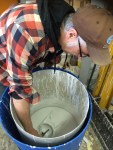
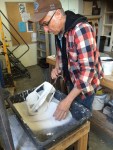
Me putting ceramic shell on mold.
-

-
Ceramic shell going on mold.
-

-
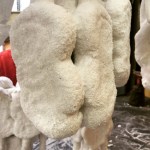
First coat of ceramic slip. Note you can still see all the detail.
-
-
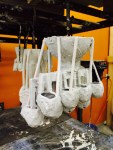
Eight rocks in process of having the ceramic shell put in place.
-
-
Me adding a layer of sand to wet ceramic slip.
-
-
This mold has all its ceramic and sand coats.
-

-
Molds hanging out between coats of ceramic and sand.
-
-
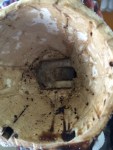
This mold has had the wax melted out of it.
-

-
First look, breaking away mold after casting.
-
-
Breaking away the mold, you can see a left and right half.
-

-
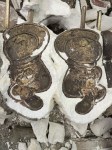
Rocks, just after the mold is broken away.
-
-
Cut from sprue and gates, starting the grinding and cleaning.
-
-
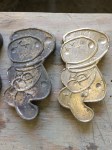
Deciding on how to assemble finished piece.
-

-
The work is slow, buffing and polishing. The next one awaits off to the left…
-

-
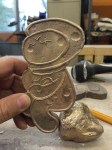
Assembly process and polish.
-

-
Finished, one of six, “Astronaut on a Rock, Second Runner Up.”